The Atlassian toolbox: How to seamlessly establish the Jira Confluence integration
Tempo Team
Like milk and cookies or peanut butter and jelly, Jira and Confluence were meant to go together. When integrated, Confluence’s content management system perfectly complements software development, ITSM, and business tracking activities via Jira. The resulting Atlassian ecosystem improves communication and access to information, boosting productivity and overall efficiency across the board.
Jira and Confluence integration is a simple process that dramatically improves your organization. Once configured, you’ll wonder how you ever did without it.
Why should you integrate Jira with Confluence?
Atlassian’s Confluence Software creates a shared workspace where teams come together to impart knowledge and collaborate, while Jira software is a powerful project management and issue-tracking tool. Together, they form a formidable application stack.
The primary reason to link Confluence to Jira is to remove silos relating to work, information, and processes. After integration, teams will automatically share issue data, project roadmaps, and documentation between platforms. Centralized data ensures business teams across the organization can access critical information without sifting through a mountain of documentation.
Without silos, your team can quickly identify priorities. Jira’s issue tracking, combined with Confluence’s content management, lets you switch seamlessly between the two platforms to:
Oversee progress on a project or sprint
Identify outstanding issues or tasks
Review and comment on critical project or issue documentation
Edit entries collaboratively
Integration also benefits productivity. Team members won’t have to switch platforms to find essential information. Integrating Jira and Confluence reduces frustration and allows your colleagues to optimize their time.
How to integrate Jira and Confluence
First, download and install the Jira Cloud project management tool and the Confluence Cloud collaboration software as separate applications. Coordinate with your IT department to ensure you have administrative privileges for both solutions.
Then, connect the platforms via the application link.
Open your Confluence dashboard
Click on the settings icon
Select “General Configuration” from the “Confluence Administration” drop-down
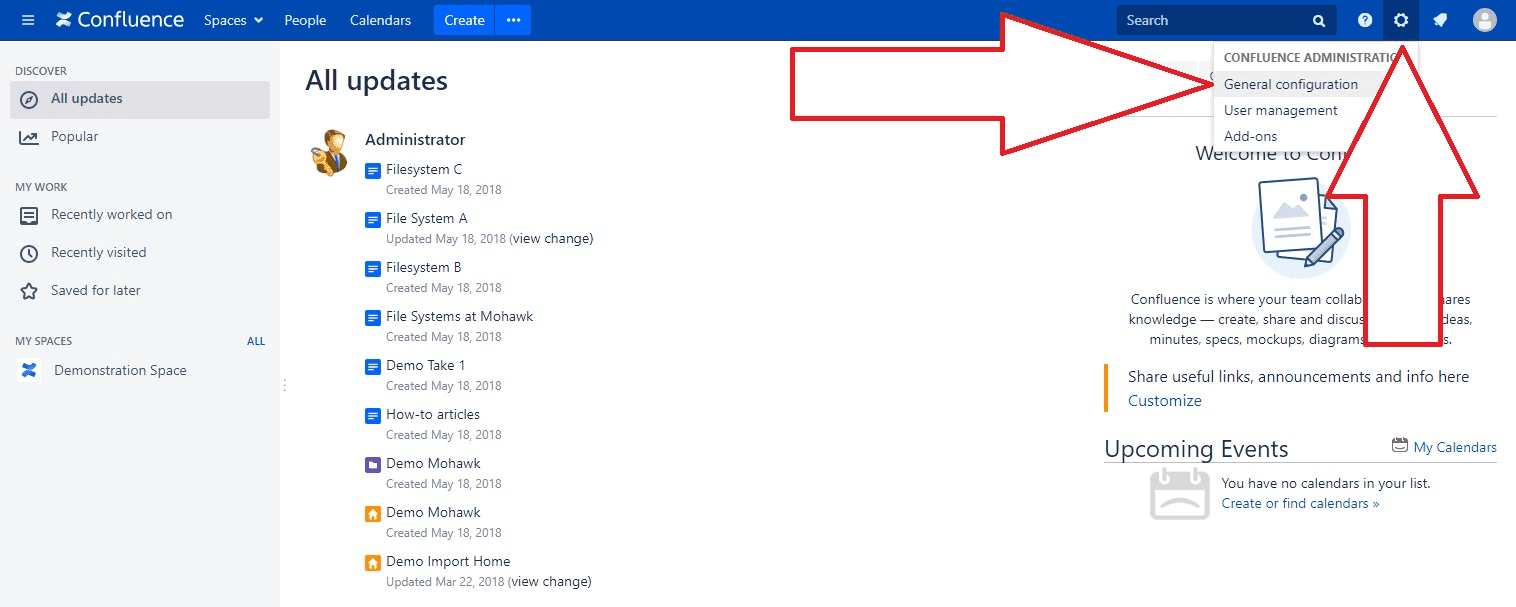
(Source: Idalko)
4. Click “Application Links” in the left navigation panel to open the “Links Configuration” page
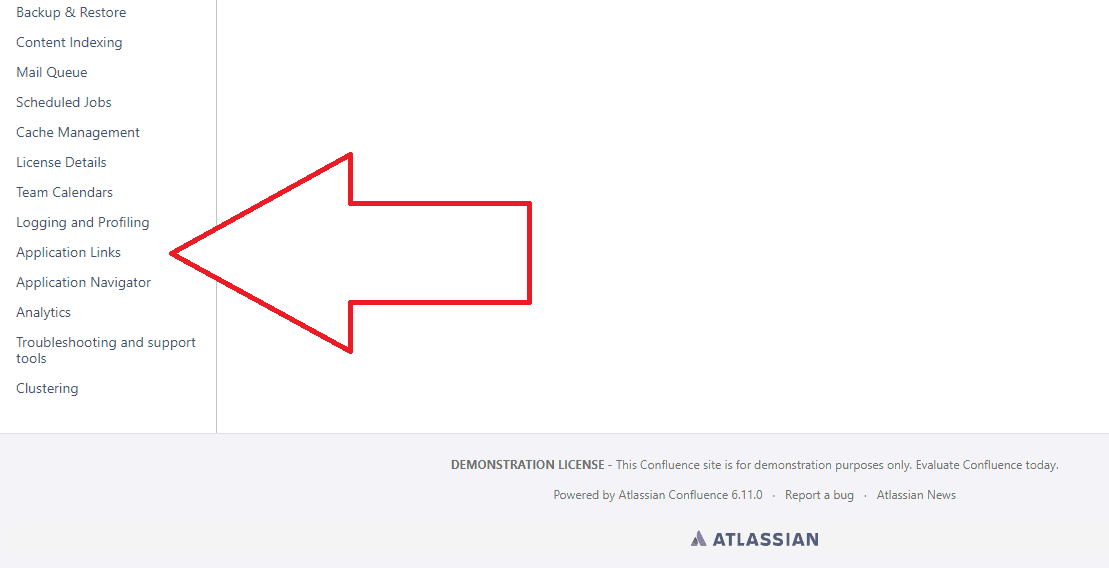
(Source: Idalko)
5. Next, enter the URL for the Jira instance you wish to connect to Confluence and click “Create new link”
6. Check the “The servers have the same set of users…” and “I am administrator on both instances” boxes
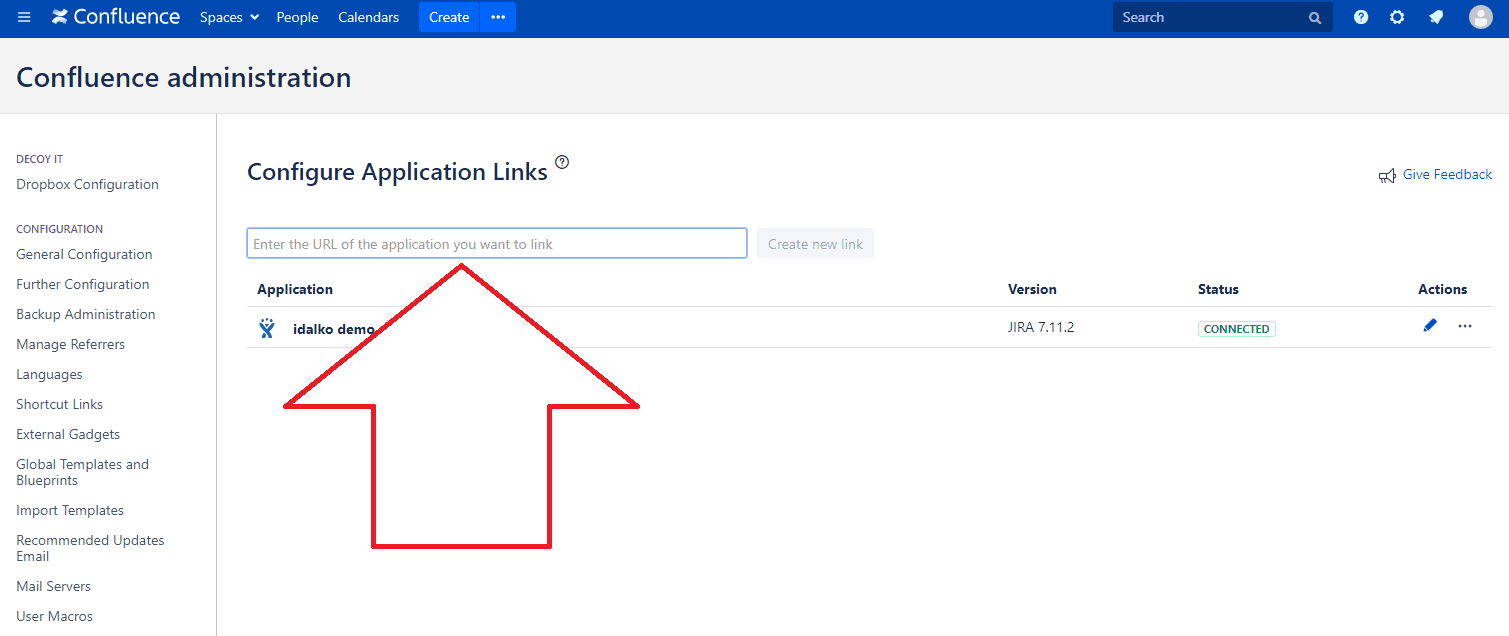
(Source: Idalko)
7. Use the Setup Wizard to complete the link configuration; if you need additional information about the Setup Wizard, visit the Atlassian website for details
Congratulations! Confluence and Jira are now linked and in sync.
Common uses and features of Jira + Confluence integration
Now that you’ve integrated your project management and collaboration tools, you have endless ways to improve workflows, bug tracking, and wiki content.
Here are a few ways to take advantage of your newly combined Jira and Confluence stack:
Jira user directory
Use the Setup Wizard to centralize user management across the Jira and Confluence platforms. Establishing a single user group streamlines management and relieves logistical headaches. In addition, you can limit cross-platform access to specific Jira user groups, adding an extra level of security by customizing permissions to relevant teams or team members.
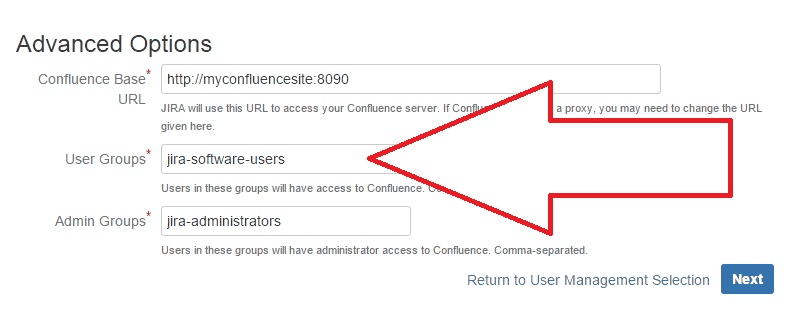
(Source: Idalko)
Adding and displaying Jira issues in Confluence
Including data from a Jira issue on a Confluence page ensures everyone is updated on its resolution. Jira contains a macro that helps you quickly add the information. With it, you can display the following:
A single issue
A list of issues
Several issues (using a specified query)
You can paste the Jira page’s URL, including any parameter or query, into the Confluence page.
Single issue: <yourjirasite.com>/browse/CONF-1234
List according to the relevant filter: <yourjirasite.com>/issues/?filter=56789
Issues specified by query: <yourjirasite.com>/issues/?jql=project%20%3D%20CONF
Or let the macro do the heavy lifting for you.
Click the “+” button at the top of the Confluence page to activate the drop-down
Select “Jira Issue/Filter”
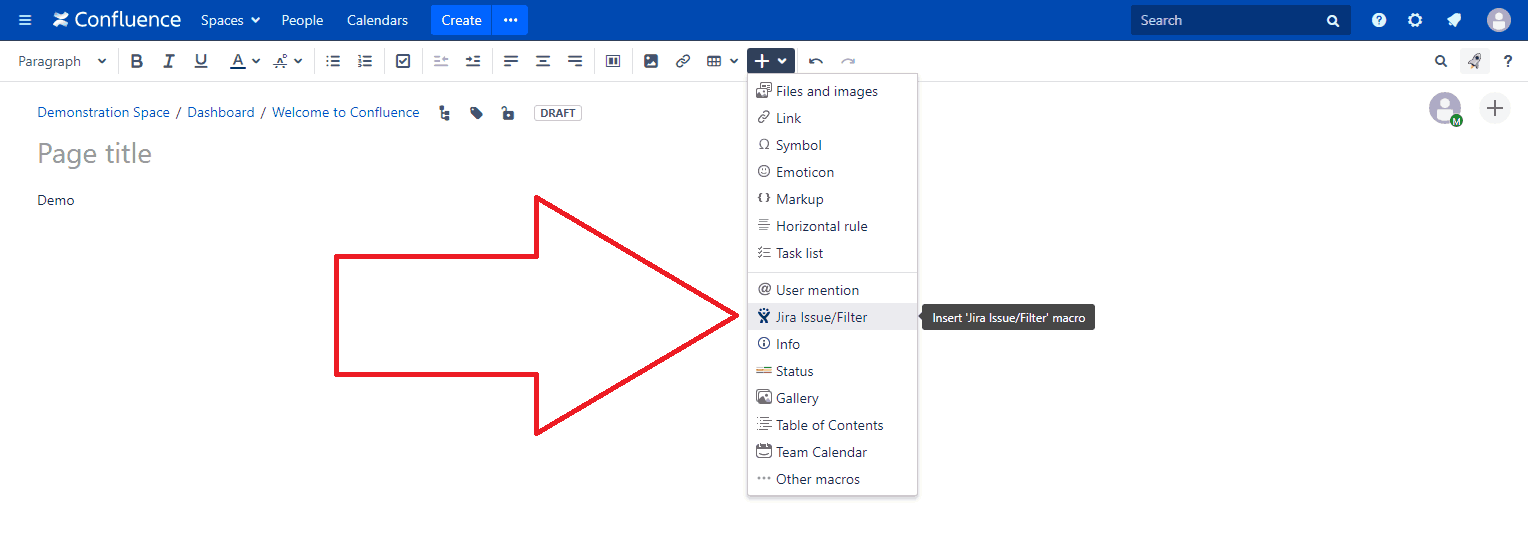
(Source: Idalko)
3. Navigate to the issue you want to include and select your display options

(Source: Idalko)
Once finished, your Confluence page will populate with the relevant information referenced in the Jira issue, allowing users to navigate easily between the two.

(Source: Idalko)
Adding a Jira roadmap in Confluence
Share context about your project plan by embedding a real-time roadmap into your Confluence page. You can communicate status updates, priorities, and blockers, ensuring everyone is aligned without switching between apps or copying and pasting content.
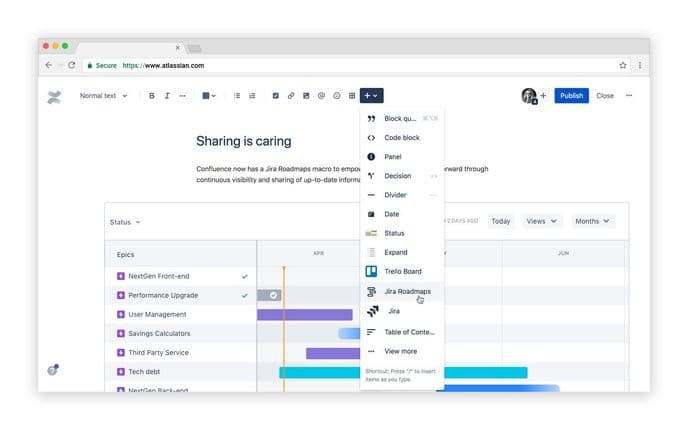
(Source: Atlassian)
Here are the steps to import your roadmap:
Click “+” from the top navigation or type /jira roadmap while editing the page
Paste the Jira instance URL into the field
Select the project and board
Click “Save”
The integration also supports adding Jira reports to Confluence pages. And agile project management isn’t left out, of course. You can easily link Kanban boards, scrum backlogs, burndown charts, and more from Jira to Confluence.
Integrating Jira Service Management (JSM) and Confluence
Jira isn’t only used to manage projects. ITSM teams manage and organize support tickets using Jira Service Management software. Just like every Jira instance, you can link the application with Confluence.
The primary benefit is a shared knowledge base of FAQs, how-to guides, and troubleshooting instructions that are accessible to clients via the customer support portal and ITSM agents.
Even if the client doesn’t self-serve, support agents can save time by searching the archive for the needed information. According to Atlassian studies, integrating JSM with a Confluence-powered knowledge base deflects 45% of customer requests.
Get the most out of Jira and Confluence integration
Now that you’ve fully integrated Confluence with Jira, there’s plenty of room to explore and experiment. Here are a few suggestions to start this software collaboration off on the right foot:
Establish real-time views
One of the best uses of the Jira-Confluence integration is setting up views from one platform to the other. Some team members may prefer to view Jira’s dashboard within Confluence or have Confluence documentation appear within Jira. By establishing real-time displays within both platforms, team members can access up-to-date information no matter their work preference.
Keep everyone up-to-date with team reports and charts
Whether using Jira to track bugs, manage software development projects, or administer team tasks and workflows, you should establish transparency around the team’s caseload. Here are several methods for communicating this info:
Velocity charts
Cumulative flow diagrams
Epic and Sprint reports
User workload reports
Change logs
Status reports
Once your report or chart is complete, use the “Add new Gadget” option from Jira Cloud’s dashboard and connect it to the related Confluence page.
Provide context with Project Pages
Whether you’re working in software development or on a marketing team, background information helps teams better understand their project. Adding this information via Confluence’s Project Pages tab allows the project manager to create an archive of the following:
Project plan and charter
Sprint goals
Risk assessments
Stakeholder management plans
Design specs
And more
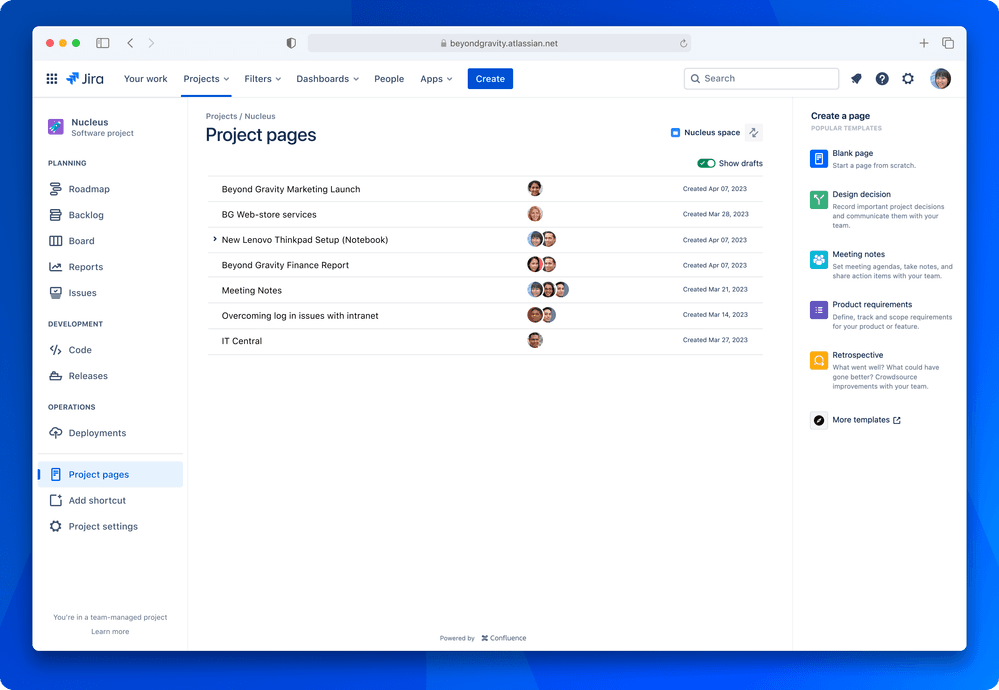
(Source: Atlassian)
Organize retrospectives
Project retrospectives are essential to the agile project management framework. They gather the DevOps team and other stakeholders to reflect on their work, identify process improvements, and create an action plan for future scrums or epics.
Whenever you complete a sprint in Jira, create a Confluence page dedicated to the retrospective using the software’s Retrospective Template. Simply click “Create a retrospective page for this sprint,” and the page will create itself.
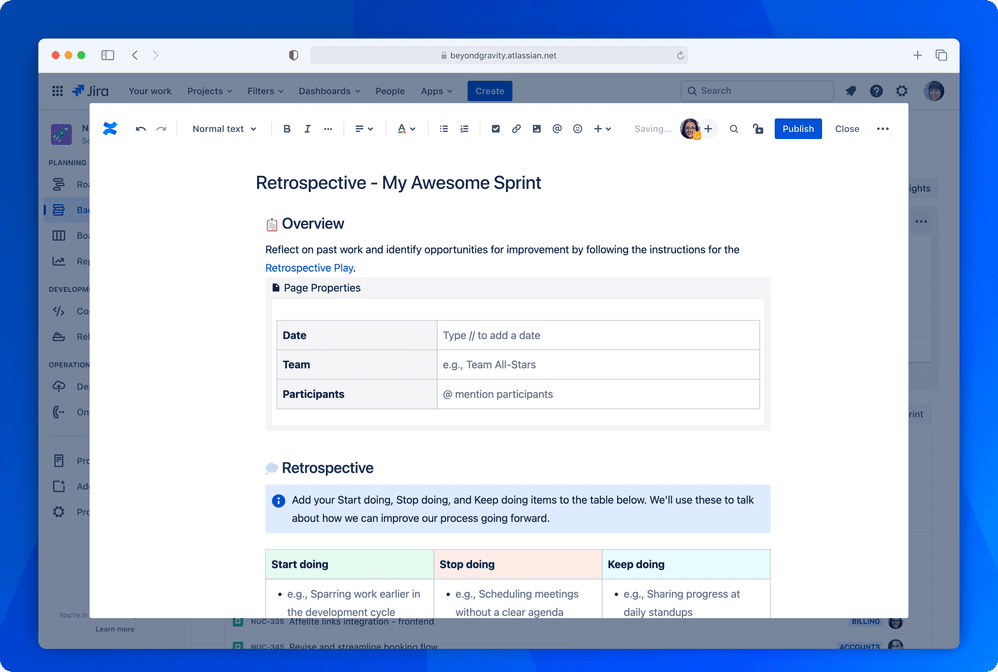
(Source: Atlassian)
Retrospectives automatically link to each sprint’s burndown chart within the Reports page, identifying insights that project management can discuss with the team during the meeting.
Final words
You can combine the power of Atlassian’s Jira Cloud and Confluence software into a single integrated application to produce a formidable business solution. It’s hard to beat this combination of a collaborative platform with a project management and issue-tracking application. But that doesn’t mean you can’t improve upon it further.
Level up your Jira-Confluence integration with Tempo apps that extend your stack’s capabilities.
Tempo Strategic Roadmaps helps you prioritize tasks and identify potential blockers by creating audience-friendly project roadmaps
Timesheets is a robust time and resource management application
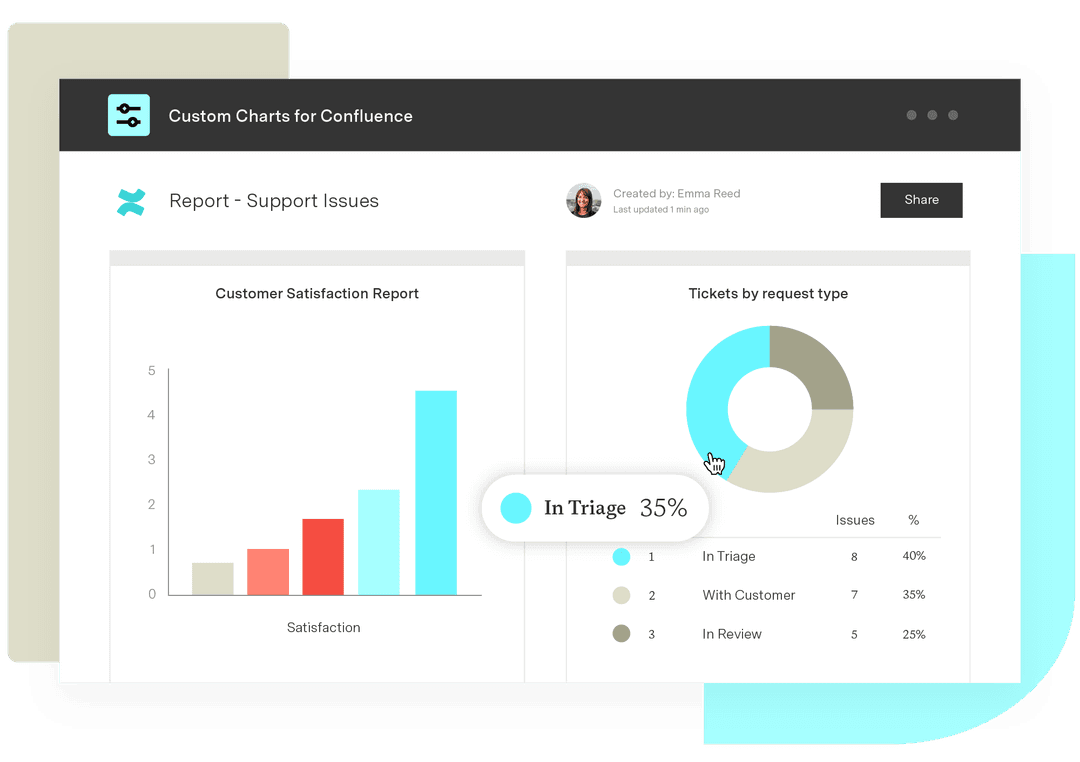
Custom Charts for Jira improves team communication by creating customized visuals to illustrate your reports
All these solutions are Jira-enabled, making them perfect additions to round out your collaboration toolbox.
Sign up for a demo
Request Demo