Unlocking the potential of SLA in Jira: A quickstart guide
Tempo Team
A company lives or dies by its ability to satisfy customers, but satisfaction is a difficult concept to measure. Fortunately, service level agreements (SLAs) offer a clear and specific metric for how effectively you’re addressing your clients’ concerns.
Once you’ve established expectations with an SLA, you can use a tracking platform like Atlassian’s Jira Service Management (JSM) to ensure you live up to them. JSM allows you to create support desk tickets and monitor them from initiation to resolution, ensuring each issue is closed according to the terms of your client’s SLA.
Configuring Jira SLAs is straightforward and includes time-saving automation options. Your customers will benefit from a smoother solution delivery, and your team will become more efficient. Here’s everything you need to know.
What is a service-level agreement (SLA)?
Service level agreements are contracts between a service provider (that’s you!) and its internal or external clients. SLAs define the services delivered and expectations regarding ongoing support.
SLAs are most common within IT service management (ITSM), but they’re gaining traction in other industries that follow the service desk model. For example, facility management uses SLAs to define lighting and heating maintenance schedules, supply room stock levels, and how often they empty garbage bins.
Regardless of the industry, SLAs set realistic deadlines for response and resolution while outlining steps the client can take if the service provider breaches the contract.
The importance of SLAs
Implementing an SLA is mutually beneficial for service providers and clients. It establishes an environment of trust in several ways, including:
Facilitating a shared understanding of expectations that permits structured conversations between stakeholders about agreed-upon terms of service
Laying out the process for escalations in case of a breach of the agreement
Defining an issue’s urgency and removing guesswork surrounding priority so the support team can address essential problems first
Types of SLAs
There are three types of SLAs available in Jira:
Customer-based SLA
In this format, the customer and service provider negotiate an agreement outlining the services included in the contract and their quality.
Service-based SLA
This is a routine, one-size-fits-all contract that most providers offer their clients. The format is inflexible regarding diverse client needs, but it guarantees consistency.
Multi-level SLA
Multi-level SLAs accommodate a variety of conditions to meet specific user requirements, making this the most customizable format.
SLA metrics
To successfully manage SLAs in Jira, you need objective metrics to track your team’s performance. Some standard metrics include:
Time to first response: The length of time it takes the ticket’s assignee to acknowledge and address the customer’s issue
Guaranteed service uptime: The percentage of time the service is fully operational and available for customer use, as defined in the contract
Average handling time: The time from the client’s initial issue report to when it’s resolved
Resolution time: The time from the client’s initial issue report to when it’s resolved, including the initial response time
Number of tickets resolved: How many tickets support team members resolve in a set period
The importance of reporting on SLAs
An SLA isn’t worth much if you can’t tell whether you’re satisfying the terms of the contract. You won’t be able to determine whether you’re meeting your client’s expectations, let alone identify areas for improvement. That’s why metrics, such as time to resolution and SLA success rate, are essential.
Jira SLA reporting creates automated reports so you can review key metrics and ensure your team upholds the terms of its contracts. Reports also help leaders spot trends in performance so they’re better equipped to optimize productivity and support their teams.
How to implement and monitor SLAs in Jira Service Management
With Atlassian’s Jira Service Management, you can easily create and configure a new SLA to meet your needs in just a few keystrokes. In addition to custom options, the software also includes several out-of-the-box SLA reports. Using Custom Charts for Jira, you can leverage multiple visualization options, including line and bar graphs, to visualize performance data on your dashboard.
Here’s the process for setting up and managing SLAs in Jira Service Management:
1. Configure the SLA
First, define the agreement within the client’s assigned project.
Enter the service project, select the “Project settings” tab, and click “SLAs.”
Choose “Add SLA.”
In the field with the clock icon, enter the name of your new SLA. You can’t alter the name once it’s saved, so employ a unique naming convention that defines what the SLA tracks or measures.
2. Set SLA conditions
Next, define one or more events that will trigger the activation of the SLA tracking.
Scroll down to the “Conditions” section of the SLA page.
Select “Add condition” below “Start counting time when.” Click the condition that will initiate time measurement according to your SLA.
To establish conditions that optionally suspend the time count (e.g., if you’re waiting for the client’s response), click the “Add condition” button beneath “Pause counting time when.”
To establish the condition that will stop the SLA clock from counting down, click the “Add condition” button under “Finish counting time when.”
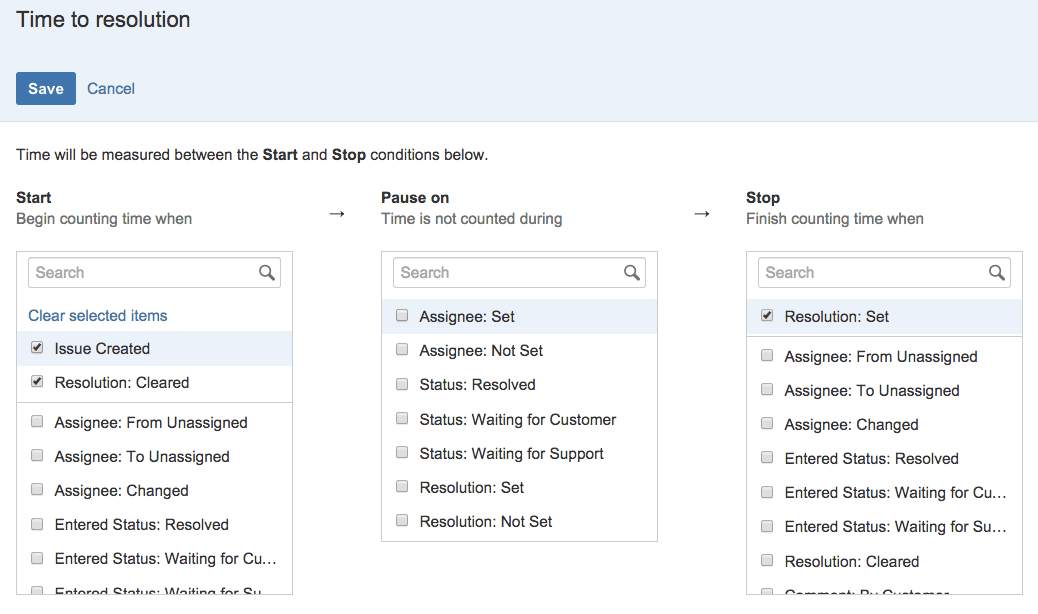
(Source: Atlassian)
3. Establish SLA goals
You can now establish the criteria that determine whether the service team has breached the SLA.
Scroll down to “Goals” and select the “+” icon.
Locate the “Time goal” section and set the time limit for the team to resolve an issue according to the terms of the SLA.
Under “Issues (JQL),” specify which support services you want to track using a JQL query.
Set performance goals in your SLA. Then, order them according to importance using the drag-and-drop feature. JSM will track the issues against the first goal criteria they match on the priority list.
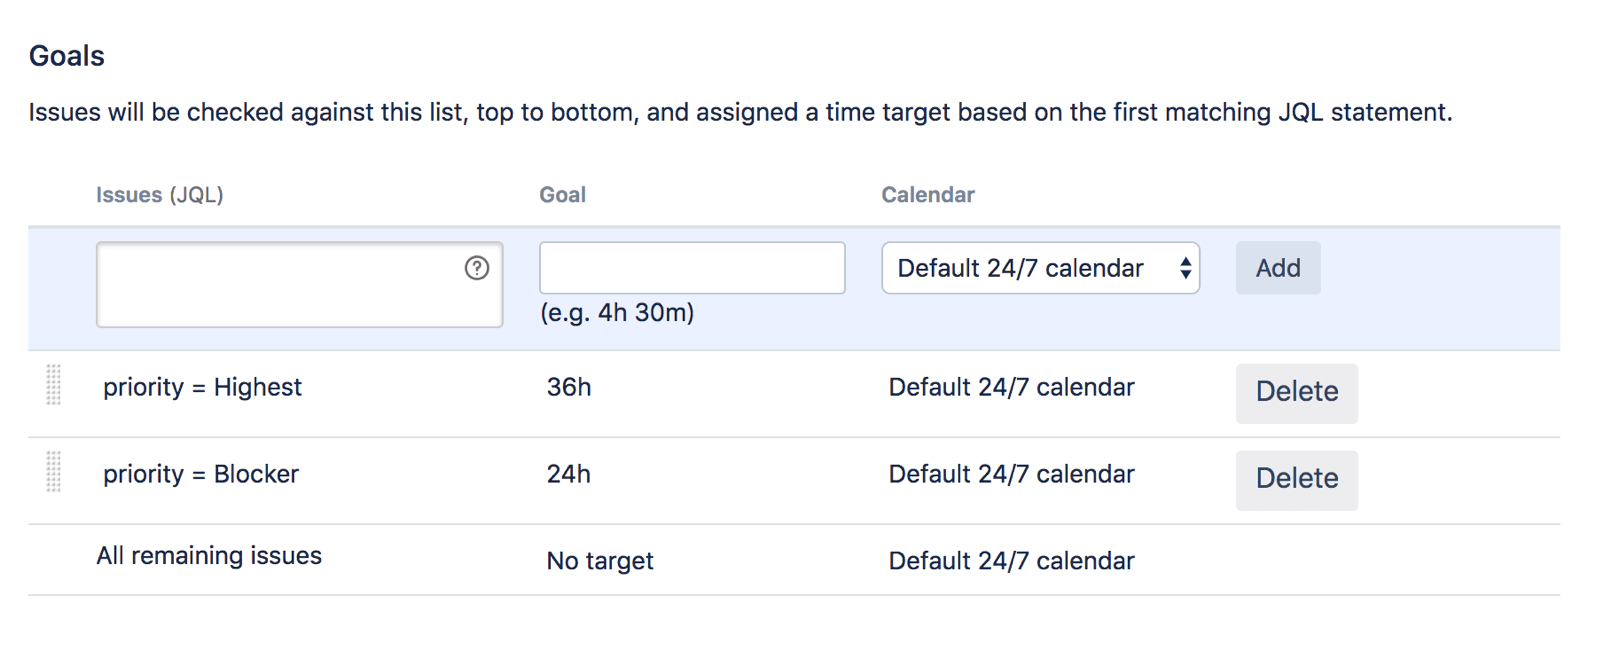
(Source: Atlassian)
4. Create SLA calendars
Account for weekends and holidays in your countdown by configuring the SLA’s calendar.
Click the calendar icon at the top right corner of the page.
Select the “Add calendar” button, enter a calendar name, and choose the team’s time zone.
Establish the support schedule by selecting working days and adding time slots.
If your team has daily periods dedicated to customer support, click the “+” icon again to add working hours to each calendar day.
Remember to add holidays and mandatory days off to the calendar.
Click “Save.”
Congratulations! You’ve configured your SLA.
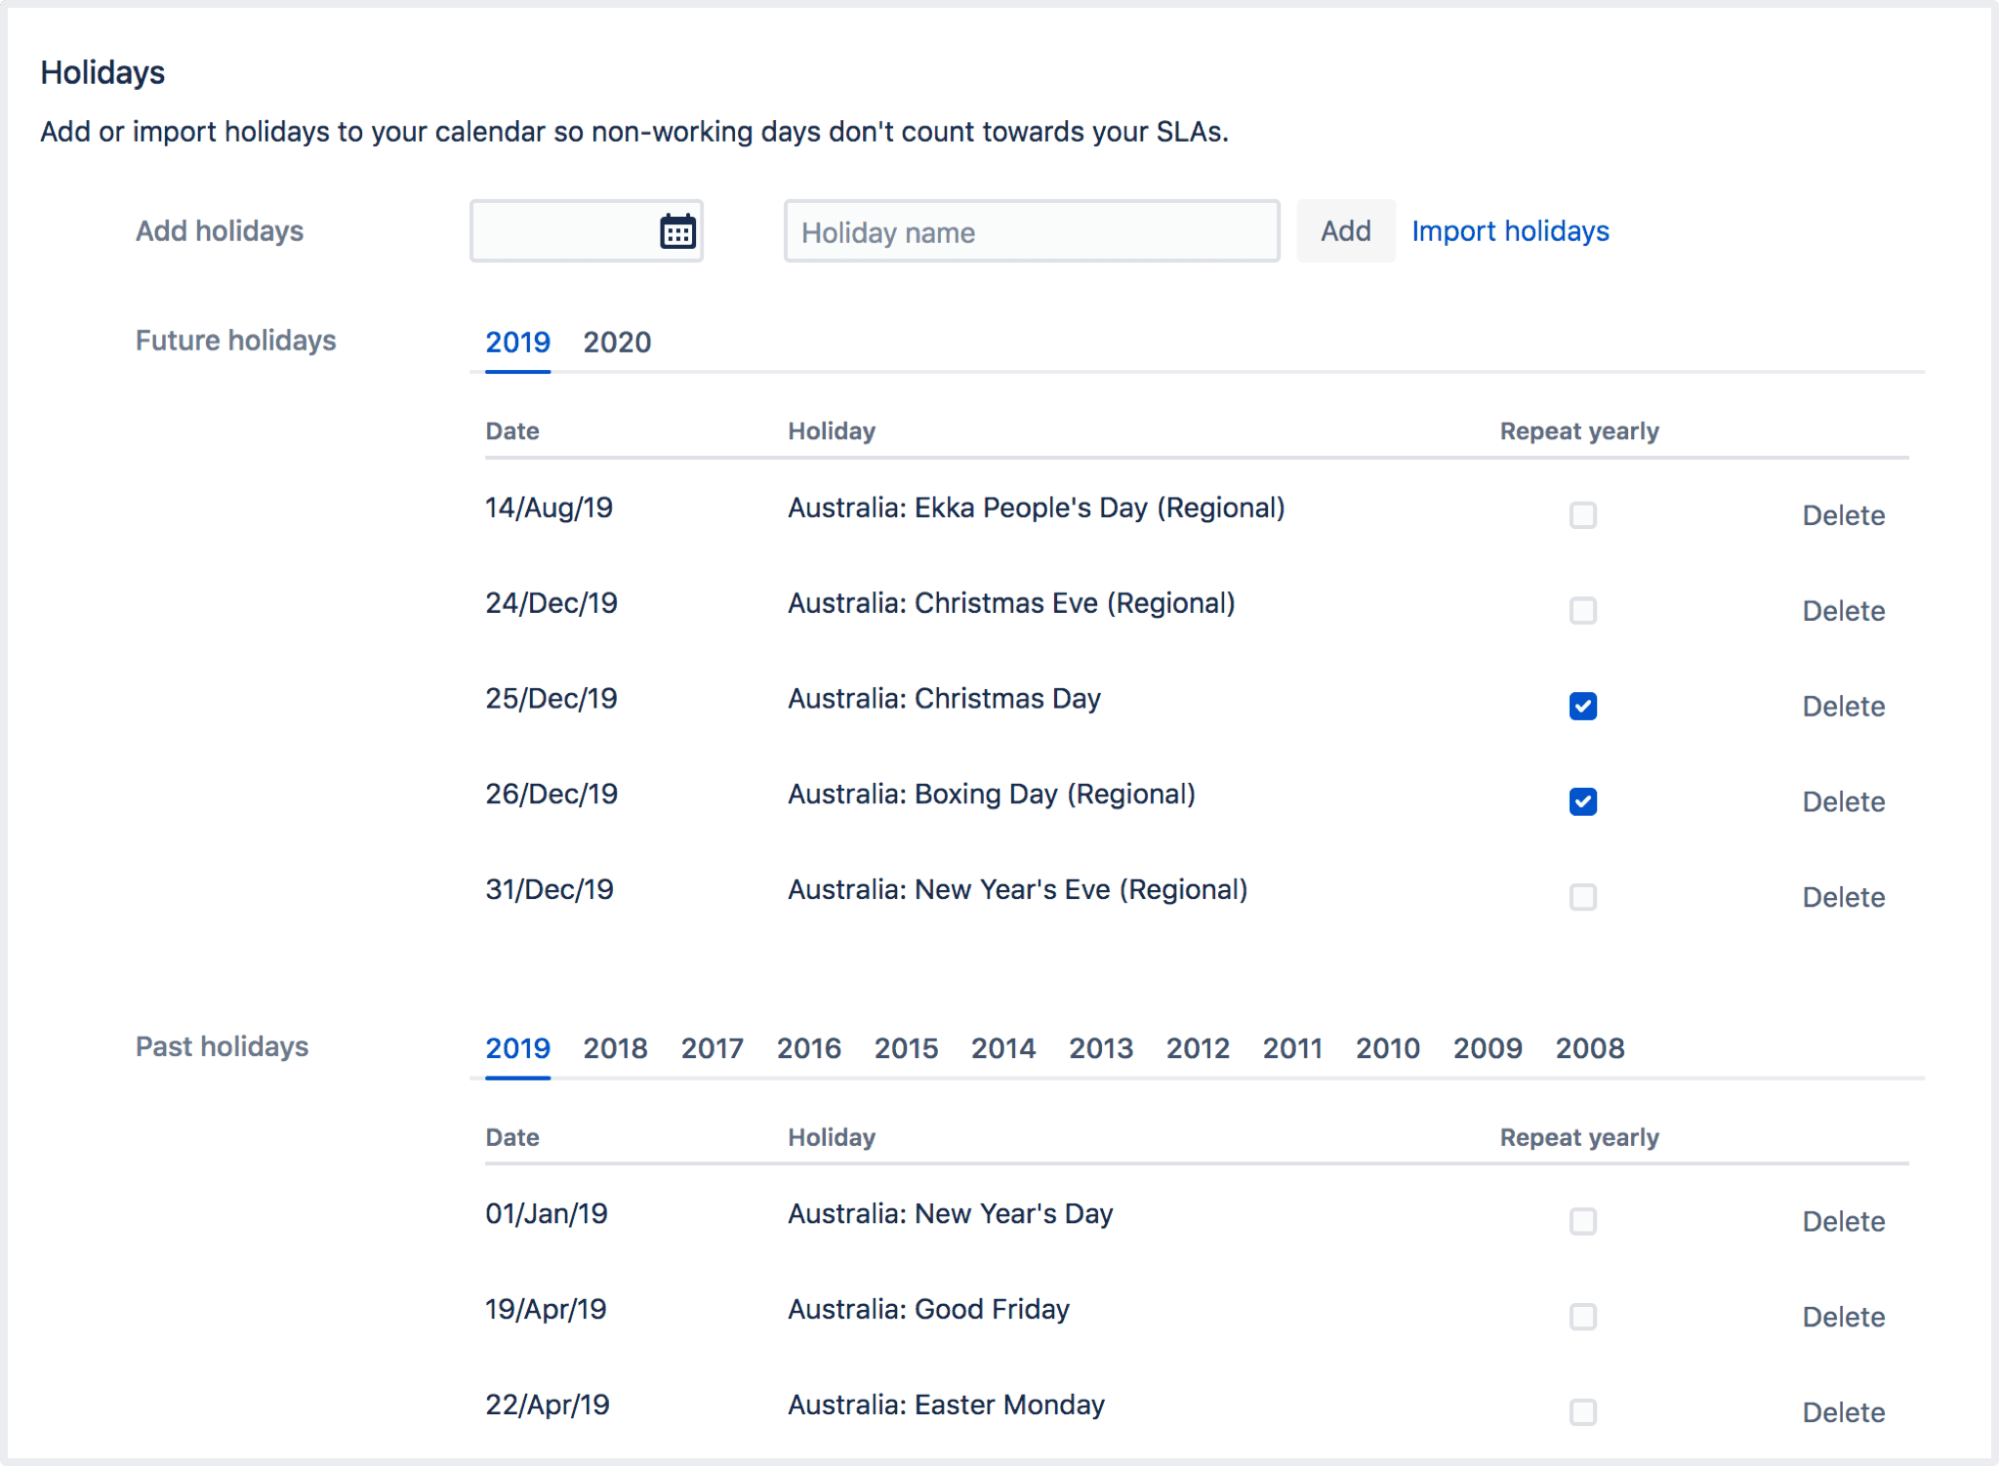
(Source: Atlassian)
5. Include automation rules
JSM offers default automation rules for SLAs, which automatically close service requests and incidents three days after a support agent marks them resolved. Including these automation rules in your SLA takes a repetitive task off your hands.
SLA best practices
A few best practices will ensure you get the most out of the Jira Service Management platform when configuring an SLA:
1. Set realistic goals
Ensure your team can consistently achieve the goals and objectives you establish. If they frequently miss targets, review their process to identify and fix potential blockers or allocate additional resources to boost performance.
2. Be flexible
A one-size-fits-all approach doesn’t suit every client. Instead, remain flexible when establishing SLAs by personalizing response and resolution times based on issue priority.
3. Consider off-time
Decide how off-hour periods and outages will impact time tracking during SLA negotiations. Once you finalize details with stakeholders, include these periods in your SLA calendar.
4. Select the right metrics
Don’t limit your tracking to performance goals; they’re only a piece of the puzzle. Get a holistic overview by including KPIs like customer satisfaction (CSAT) ratings alongside your SLA reports.
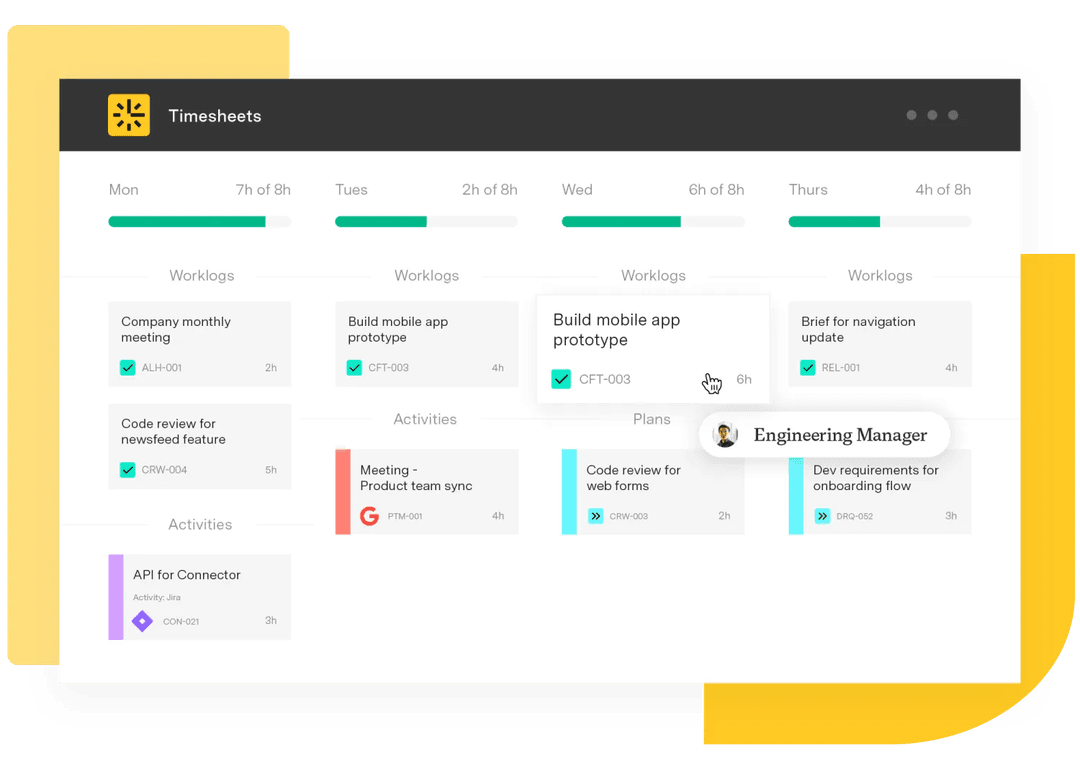
Take advantage of Jira SLAs with Tempo
Get additional support for service teams with Tempo. Jira-enabled Timesheets integrates with your existing Jira Service Management configuration to support JQL time- and resource-tracking queries as part of your goals and performance reporting.
Strategic Roadmaps creates an audience-friendly visual roadmap to plot your team’s issue resolution process. This added transparency lets your team quickly locate roadblocks, improve workflow, and standardize procedures. Boost your organization’s productivity and enhance customer satisfaction along the way.